Editor Overview
Table of Contents
Interface at a Glance
The Editor opens automatically after you finish recording. It is divided into four main areas:
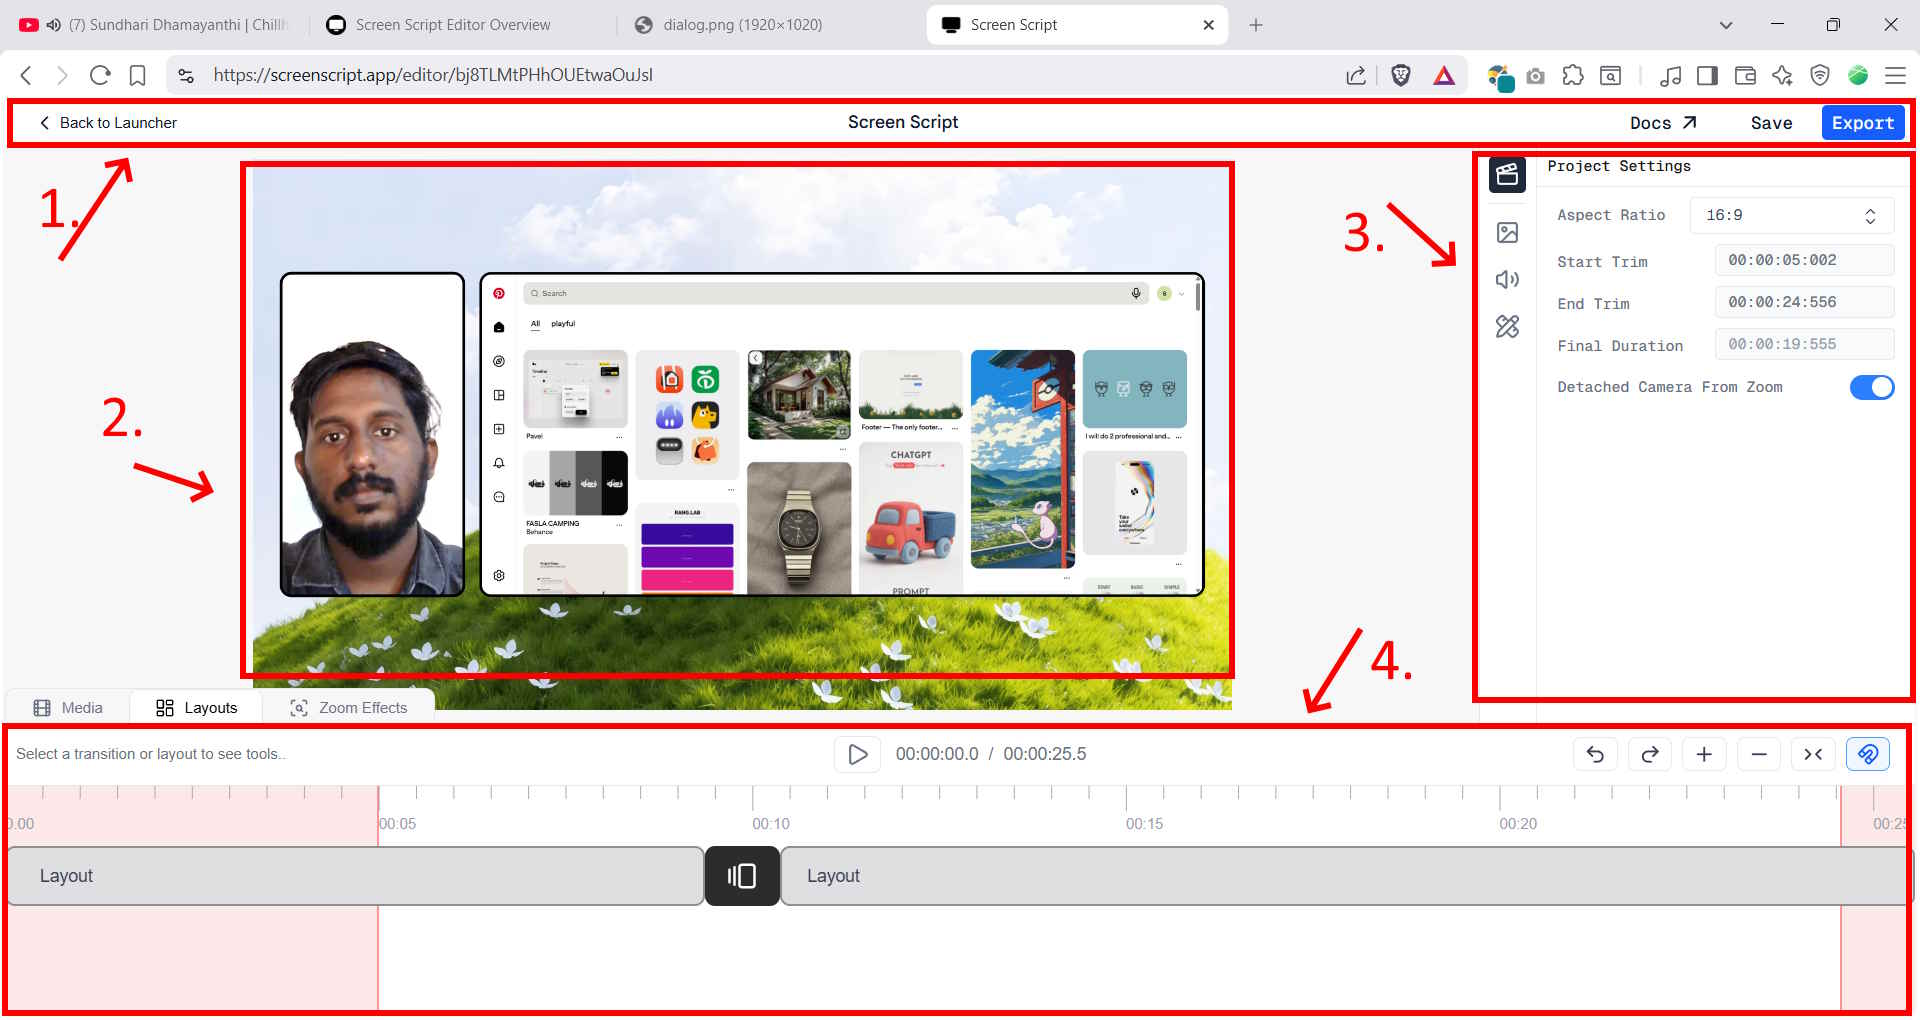
Screen Script Editor interface overview
| Area | Location | Purpose |
|---|---|---|
| Navbar | Top of the window | Navigate back, open docs, save edits, and go to export |
| Video Preview | Center | Watch your recording as you make edits |
| Properties Panel | Right side | Adjust project settings or properties of a selected element |
| Timeline | Bottom | Navigate, trim, and add effects to your recording |
Navbar
The navbar runs across the top of the Editor window.
- Back to Launcher (left) — returns you to the Launcher. Your project is not lost; you can reopen it from the Launcher.
- Docs (right) — opens the Screen Script documentation in a new tab.
- Save (right) — saves all your manual edits to the project.
- Export (right) — saves your edits and takes you to the Export page where you can render and download your final video.
Video Preview
The center of the Editor is the video preview area. This is where you watch your recording while you edit it.
- Scrub through the video using the playhead in the timeline.
- Changes you make — such as layout adjustments, zoom effects, or trims — are reflected live in the preview.
Properties Panel
The Properties Panel sits on the right side of the Editor. It serves two purposes depending on what you have selected.
Project Settings
The left edge of the Properties Panel has a strip of toggle icons. The first icon opens Project Settings, which apply to the whole video:
- Aspect Ratio — choose from 16:9, 4:3, 1:1, or 9:16.
- Start Trim / End Trim — cut unwanted footage from the beginning or end of your recording.
- Final Duration — shows the resulting video length after trims are applied.
- Detached Camera From Zoom — when enabled, the webcam overlay stays fixed in place while zoom effects apply only to the screen layer.
The other icons in the strip switch to settings for audio, styling, and other project-wide options. These are covered in their own dedicated sections.
Element Properties
When you select an element in the timeline — such as a zoom effect block or a layout segment — the Properties Panel updates to show properties for that specific element. For example, selecting a zoom effect shows:
- Zoom amount — how far in to zoom.
- Position — which part of the screen to focus on.
- Timing — how long the zoom-in and zoom-out transitions take.
Each timeline type (Media, Layouts, Zoom Effects) has its own set of element properties that appear here when something is selected.
Timeline
The timeline sits at the bottom of the Editor. This is where you sequence, trim, and arrange all your edits.
Timeline Tabs
On the left side of the timeline header, tabs let you switch between different timeline views:
- Media — shows your recorded footage track.
- Layouts — shows layout segments; switch which layout is active at any point in the video.
- Zoom Effects — shows zoom effect blocks you have added.
Each tab has its own set of blocks and controls in the timeline track area below.
Playback Controls
In the center of the timeline header you will find the playback control:
- Play / Pause — start or stop video playback.
- Timestamp — shows the current playhead position and the total video duration (for example,
00:00:05.0 / 00:00:25.5).
Timeline Controls
On the right side of the timeline header:
- Undo / Redo — step backwards or forwards through your edit history.
- Zoom In / Zoom Out — increase or decrease the time scale of the timeline for more or less precision.
- Fit to Window — zoom the timeline out to fit your entire recording in view at once.
- Snap — toggle snap-to-grid so that elements align precisely when you drag them.
For next steps, see the guides for Zoom Effects and Layouts.