Quick Start Guide
Follow these five steps to go from zero to a finished video. By the end, you'll have a recorded, edited, and exported screen recording ready to download or share.
Before you start
Chrome or Edge are recommended for the best experience — they support system audio capture and offer higher storage limits. Screen Script works in other modern browsers, but some features may be limited.
You'll need:
- A modern browser (Chrome or Edge recommended)
- A screen, window, or tab you want to record
- Optionally, a webcam and/or microphone
1. Create a Project
- Open https://screenscript.app/launcher.
- Click New Project.
- Enter a project name and create it.
- Click Record on that project.

Click New Project
2. Choose Recording Sources
In Recorder, enable any source you need:
-
Screen — capture a tab, window, or full screen
-
Camera — overlay your webcam feed
-
Microphone — record voice narration
-
Android — stream your phone screen (requires Beta toggle)
At least one source must be enabled before you can start recording.

Enable the sources you need
Permissions
- Camera and microphone: your browser will ask for permission. You can choose to allow permanently or just once.
- Screen: you must select which tab, window, or screen to share every time — this is a browser requirement.

Pick tab, window, or full screen
3. Start and Stop Recording
- Click Start Recording.
- Perform your walkthrough or demo.
- When finished, click Stop Recording from the recording dialog.
- Screen Script automatically opens your project in the Editor.

Start recording
Don't worry about mistakes — you can trim them out in the next step.
4. Edit Your Recording
The Editor opens with your recording loaded on a timeline. The interface has three main areas: the viewport (center), the properties panel (right), and the timeline (bottom).

The Editor with properties panel, timeline, and controls
Top bar
The top bar has three actions: Docs (links to this documentation), Save (saves your current edits), and Export (opens the export page).
Properties panel
On the right side, a vertical icon selector lets you switch between different settings that apply across the full video:
- Project Settings — set the aspect ratio (16:9, 4:3, 1:1, 9:16) and adjust start/end trims.
- Wallpaper — change the background behind your recorded content.
- Audio Controls — adjust microphone volume and device/system audio levels.
- Additional Customization — configure strokes around video layers, their color, and thickness.
Timeline and playback
At the bottom of the editor:
- Play button and time display — preview your recording and see the current playback position.
- Timeline controls — zoom in/out on the timeline, fit to width, undo/redo, and toggle snapping.
Timeline modes
Use the timeline selector tabs to switch between three editing modes:
- Media — trim, split, or delete segments. Changes apply to all media tracks at once (screen, camera, and audio move together).
- Layouts — arrange how your recorded sources (screen, camera) are positioned on screen. You can change layouts at different points in time and adjust transitions between them.
- Zoom Effects — add zoom-and-pan keyframes at specific points in your video. Set the zoom level and the position to focus on.
Quick first edit
Try these three basic edits to get familiar with the Editor:
1. Change the wallpaper Select Wallpaper from the properties panel and pick a background you like. This replaces the default background behind your recorded content.

1. Select the wallpaper, 2. select differnt type of wallpaper
2. Trim the start and end
Select Project Settings and set Start Trim to 00:00:01.000 and End Trim to 1 second before the total duration. This cuts the first and last second of your recording, removing any awkward start/stop moments. Alternatively, you can drag the play head to the desired position on the timeline, and use the "Trim start" and "Trim end" buttons to adjust this value.
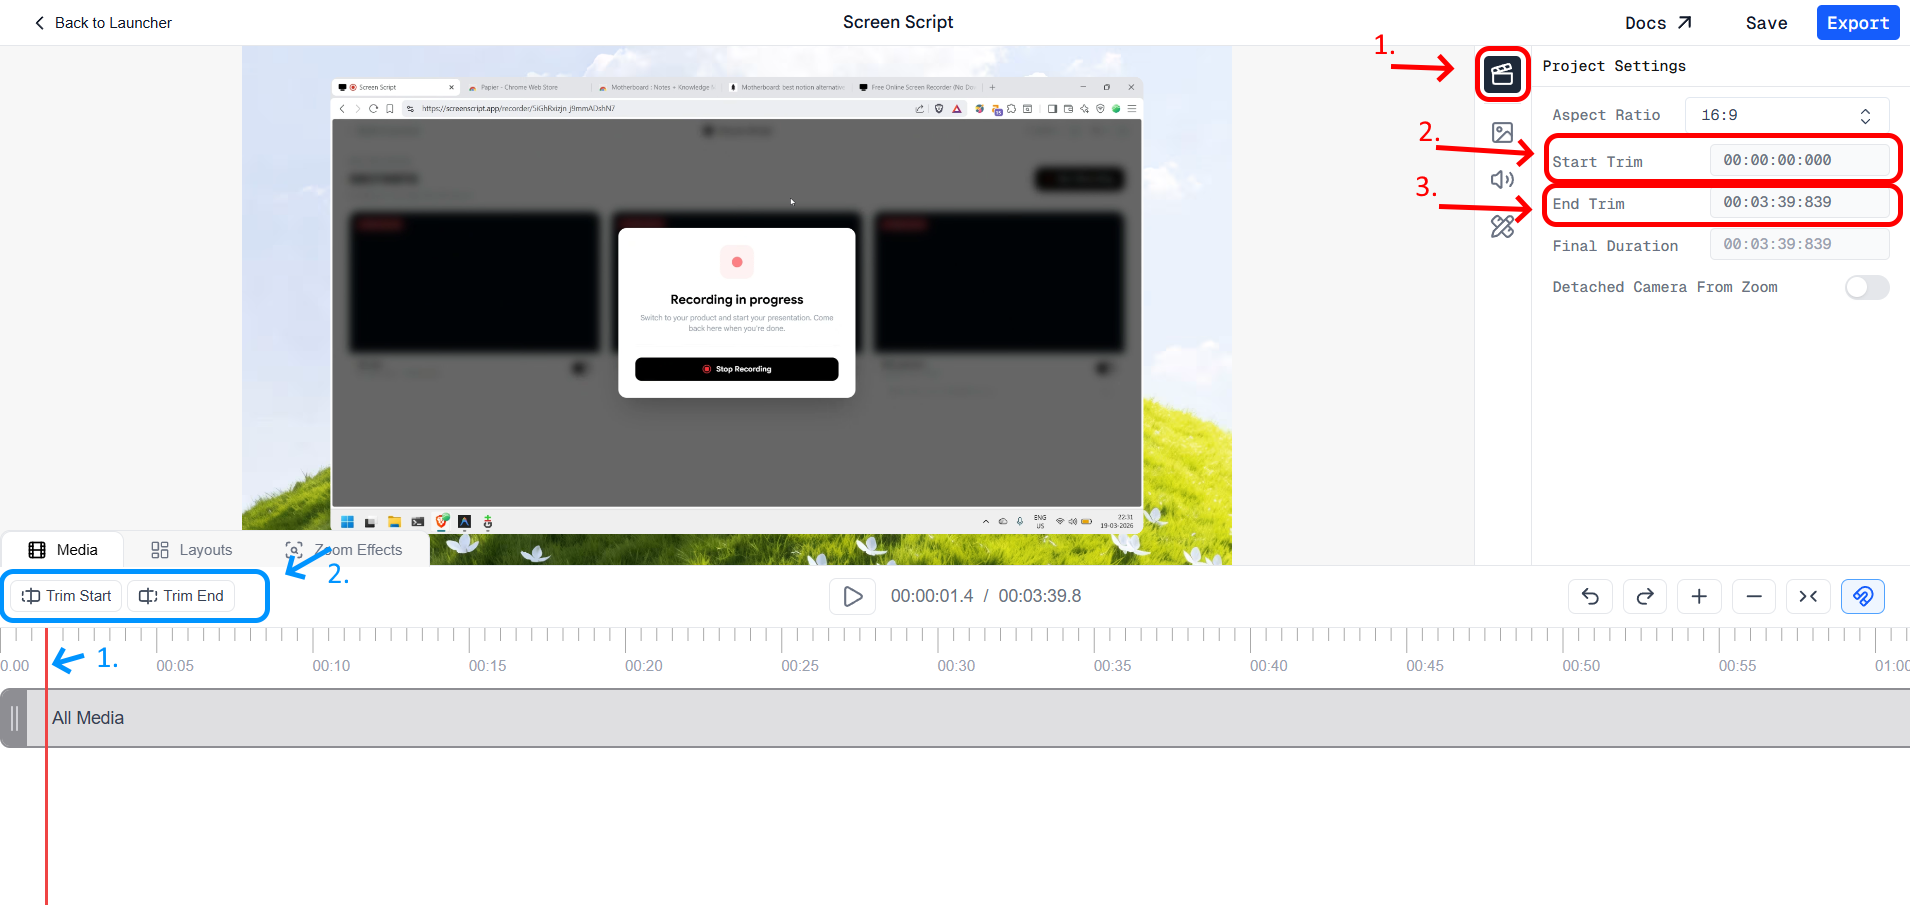
1. Select Project Settings, 2. set start and end trim
3. Add a zoom effect
Switch to the Zoom Effects tab in the timeline selector. To create a smooth zoom-in and zoom-out, add 4 points on the zoom lane:
- Point 1 — where the zoom begins (keep zoom at default).
- Point 2 — where the zoom-in reaches its target (set a larger zoom value).
- Point 3 — where the zoom holds (same larger zoom value as Point 2).
- Point 4 — where the zoom returns to normal (back to default).
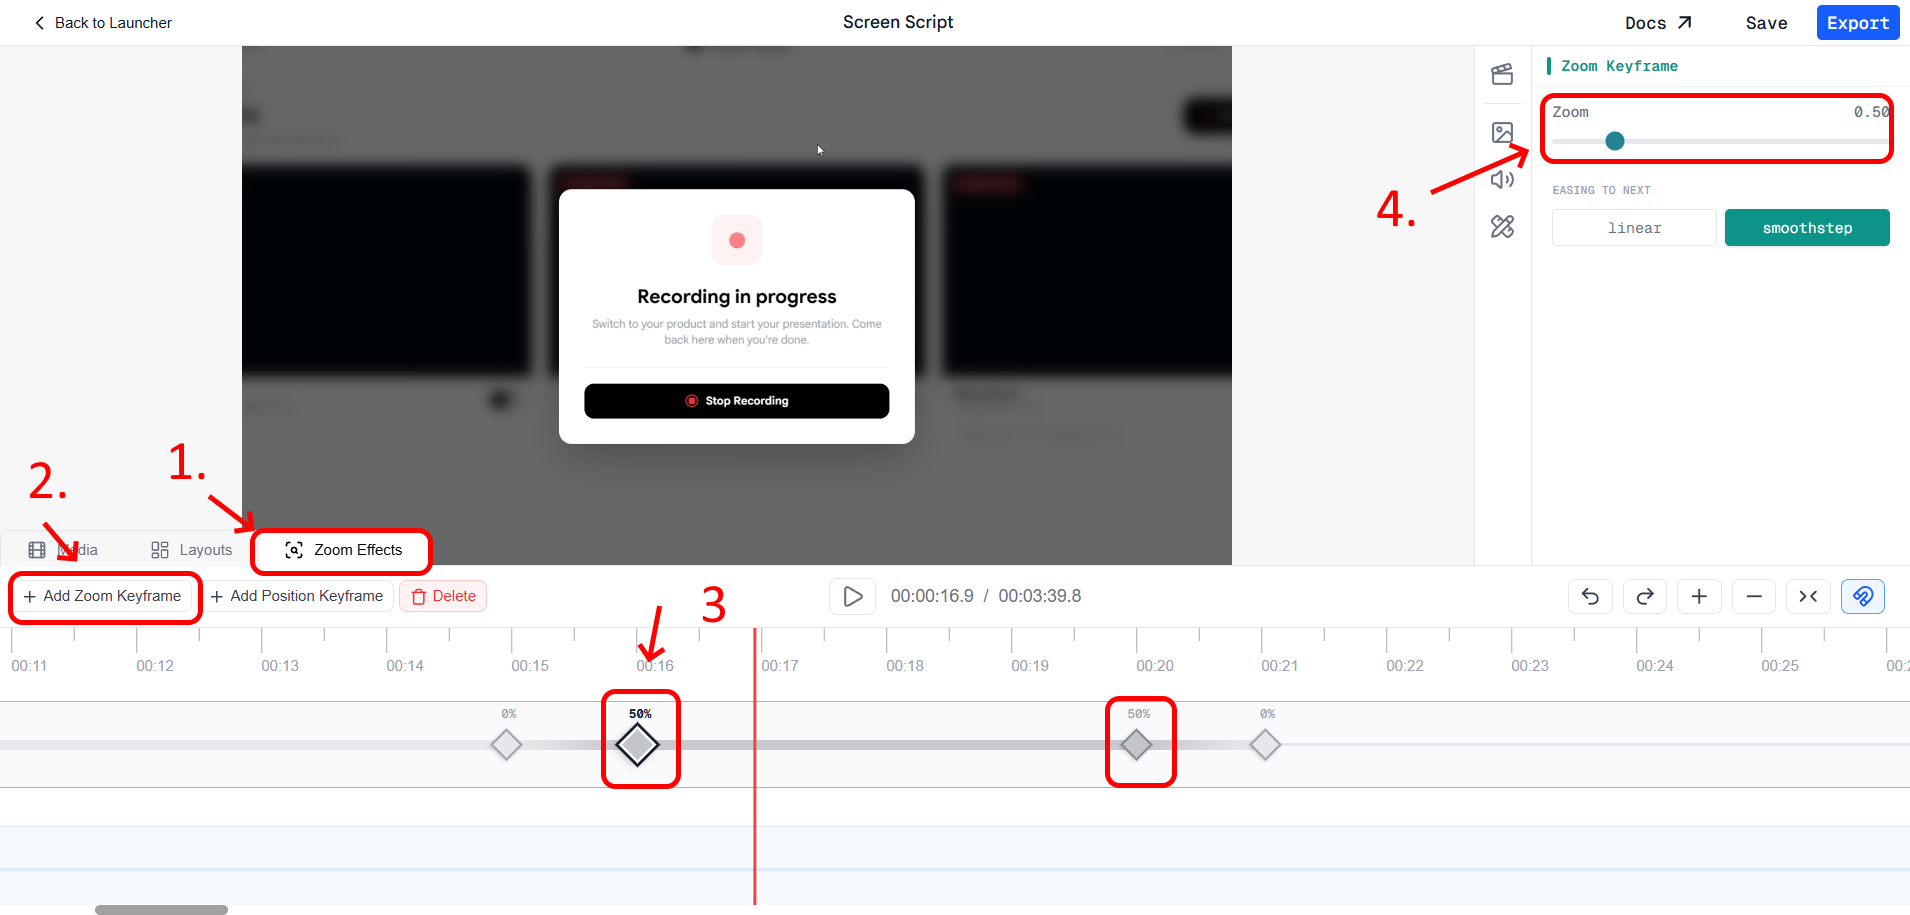
1. Select zoom effects, 2. add zoom points
Adjust the values of 2nd and 3rd to have zoom in then stay there for a while then zoom out.
This creates a smooth zoom-in, hold, and zoom-out effect on the area you want to highlight.
For a full breakdown of every editing tool, see the Editor component guide.
5. Export and Share
- Click Export in the Editor top bar.
- Select a preset resolution or enter a custom width and height.
- Click Export video and wait for rendering to complete.
- Once done, use Download to save the MP4 or Share to send it directly.

Configure export resolution
Keep the export tab active while rendering. Switching away may cause the browser to throttle the process.
Switching your system to Performance mode can significantly reduce export time. On Windows, go to Settings → System → Power & battery and set the power mode to Best performance. On macOS, keep your charger plugged in to avoid throttling.
What's next?
Now that you've made your first recording, explore further: